I’ve been wanting to design mugs as Christmas gifts for a couple years now. I finally got around to it and love the results, I can’t wait to gift these!
To start this project I gathered white mugs of all shapes and sizes, then I spent a small fortune on Porcelaine 150 pens. After spending a ton of time transferring designs onto the mug with graphite paper I was ready to use my pricey pens. Unfortunately, I very quickly realized that the Porcelaine 150 pens were all duds, they were all dried out.
I had drawn designs on 15 mugs, there was no going back on this project at this point. I decided to try the permanent marker method I know it was a huge gamble, but I had to try. It worked! I’m definitely going to warn the recipients of these adorable mugs that hand washing is the best method (if I receive a handmade gift like this I tend to keep it on display in my kitchen rather than using it anyway, but that might just be me.)
First, a few tips for the permanent marker method:
Make sure mugs are cleaned, then rub them down with rubbing alcohol before applying marker.
Use inexpensive mugs, the glaze will be more likely to heat better and meld with the marker. Dollar Store mugs have great results. I would love to see these jumbo white bistro mugs with pretty designs on them.
When baking mugs make sure to place them in the oven before you start to heat it. After they’ve baked for 30 minutes turn the oven off and leave the mugs to cool completely. This will take several hours.
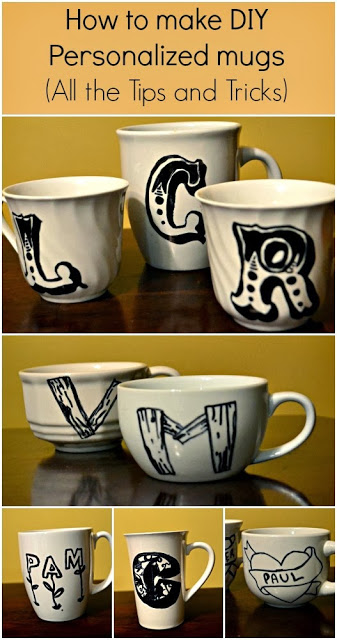
Below are my favorite mugs out of the bunch! I made mugs with a wood font for some of the guys in my family, they add a cute yet manly flare.
For my tattoo addicted motorcycle loving sister and her boyfriend I made these cute tattoo inspired coffee mugs.
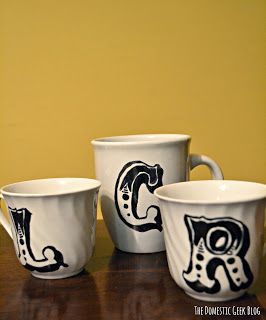
I used a fun font that reminds me of a Circus for a few of our relatives.
Here are the instructions I ended up following after a lot of research on the best methods.
What You’ll Need:
Instructions:
1. Print off graphics that you want on your mugs. I chose fun fonts. Cut out your design and cut out a piece of graphite paper.
1. Print off graphics that you want on your mugs. I chose fun fonts. Cut out your design and cut out a piece of graphite paper.
2. Make sure your mugs are clean, then wipe down with rubbing alcohol and let dry.
3. Place the graphite paper (dark side down) underneath your design and tape both pieces to your mug so they’ll stay in place. Trace the design with a pencil. Remove both pieces of paper, your image should be on the mug.
4. Trace over the graphite marks with the permanent marker.
5. Place your mug on a cookie sheet in the oven. Heat oven to 450* once it has reached 450* start a timer for 30 minutes. After 30 minutes turn oven off and let your mug cool completely in the oven. (This took at least 6 hours. It’s easiest to bake these at night, so you can let them rest all night and not worry about needing the oven for other projects.
6. To check to see if your image has baked on, rub mugs with a wet rag, if the image starts to smear bake your mugs a second time. Mine did need another round in the oven, but they turned out perfect after the second time.
Let me know if you try these out! What is your favorite design of the mugs that I created?
Written by, Brittany, the geek behind the blog. I share lots of recipes, my thoughts on the latest tech gadgets, my favorite geeky games, and snippets of life as a Work-at-home mom.


