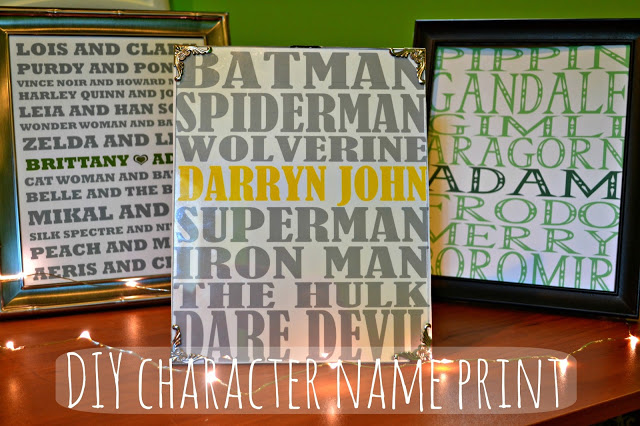
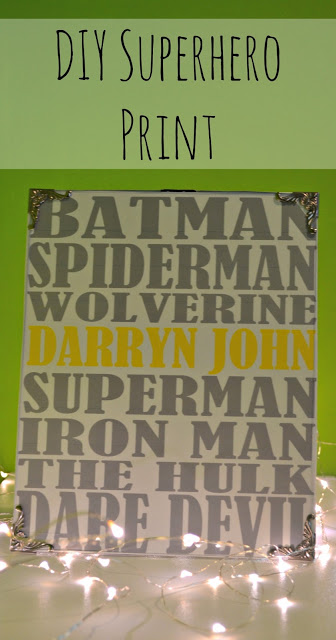
Remember my famous couple’s print? It’s my most popular pin over on Pinterest, so I decided I needed to make a better tutorial for it, and what better way than to make some more fun prints?
These prints would be the cutest for any child’s bedroom. There’s something magical about seeing your name among your favorite super heroes.
In this case, I made these prints for twenty-something year old boys, our best friend and my husband. Oh, and let’s face it, I’m most likely going to make one for my self to hang in my office as well.
I’m in love with how easy they are to make and the sophisticated/nerdy charm they create.
Really this would be great for a gift for anything; a baby shower (this would look so cute in a themed nursery,) a birthday, graduation, promotion (new office means you need cute decor, right?) Really the possibilities are endless!
Here are the instructions on Photoshop:
(You can make this in Microsoft word if you don’t have Photoshop, you can see how I did that here.)
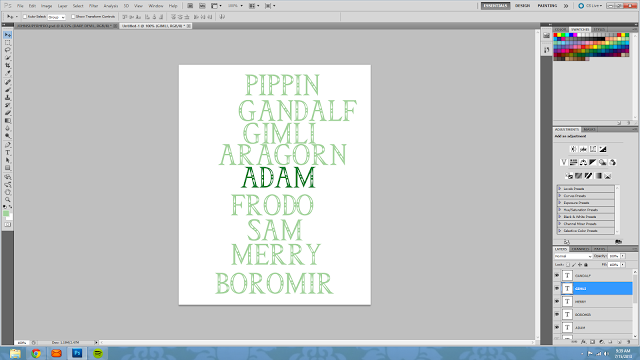
1. Make a list of super heroes names! Or character’s from a favorite movie, book, etc. Choose about 6-8 character names. (for this tutorial we’re using Lord of the Rings characters.)
Also, make sure you pick the recipients favorites, when I showed this to my husband he pouted and said, “Really, you put Boromir, but forgot Legolas?” Oh, boys..
2. Open Photoshop and create the canvas size you want I use 8 by 10 inches.
3. Figure out the font you want to use and color scheme (you can always edit this later, but it’s so much easier to decide at the beginning.) For color schemes I love using grey for the characters and a bright pop of color for your child’s name.
3. Start typing each characters name in chosen font and font color make sure that each name is typed as a new layer! Personally I prefer having the names in all capital letters for a more uniform look.
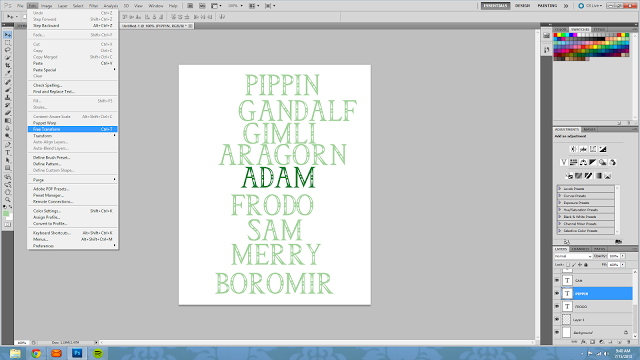
4. Starting on top, click on each name’s layer and use free transform to manipulate the words to fit onto the canvas with each letter almost hitting the ends of the canvas.
(to access free transform, make sure you have the correct word selected. Then go to the Edit menu and select free transform.)
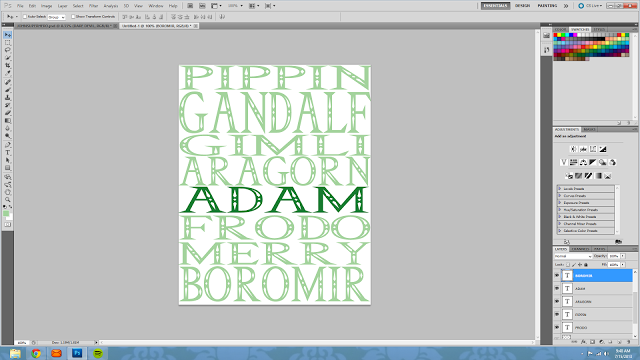
Notice that I ended up getting rid of Sam between this step and the next, it just didn’t fit well, but it’s always better to have more to start with than not enough!
5. When the words are formatted to your heart’s content make sure to save your file (I like to save it as both a PSD and PNG file.)
6. Print on card stock and cut to fit an 8 by 10 frame. Frame that beauty and gift it or proudly display it on your wall!
Well, that was quick and painless, wasn’t it?
Are you planning on making a character print? What character names are you going to use?
Written by, Brittany, the geek behind the blog. I share lots of recipes, my thoughts on the latest tech gadgets, my favorite geeky games, and snippets of life as a Work-at-home mom.

